Implementando o envio de e-mail do seu aplicativo
Há alguns passos que você precisa seguir se quiser enviar e-mails do seu aplicativo.
Vamos começar…
Antes de começar a integração com o SMTPServer, você precisa decidir se deseja usar o SMTP Server ou Nãossa API REST. Ambos os métodos garantirão o envio do seu e-mail, mas existem variações entre eles. Aqui está uma tabela para ajudar você a decidir qual estratégia é melhor para você.
| Opções | API de descanso | Servidor SMTP |
|---|---|---|
| Fácil de migrar | Não | Sim |
| Grande mudança no código | Sim | Não |
| Codding kNãowledge | Required | Nãot Required |
| Precisa atualizar o servidor SMTP | Sim | Não |
| Utilize nossa opção de personalização completa | Sim, Acesso total | Opção limitada de uso |
| Dados de resposta | Obtenha todos os dados em resposta | Dados limitados em resposta |
Depois de determinar a estratégia apropriada para a sua situação, é hora de começar a enviar. Este documento se concentrará exclusivamente no Servidor SMTP.
Após criar uma conta e pagar por um endereço IP, você será direcionado ao painel. Para criar seu servidor SMTP, você precisa executar algumas ações no painel.
No painel, primeiro adicione seu domínio.
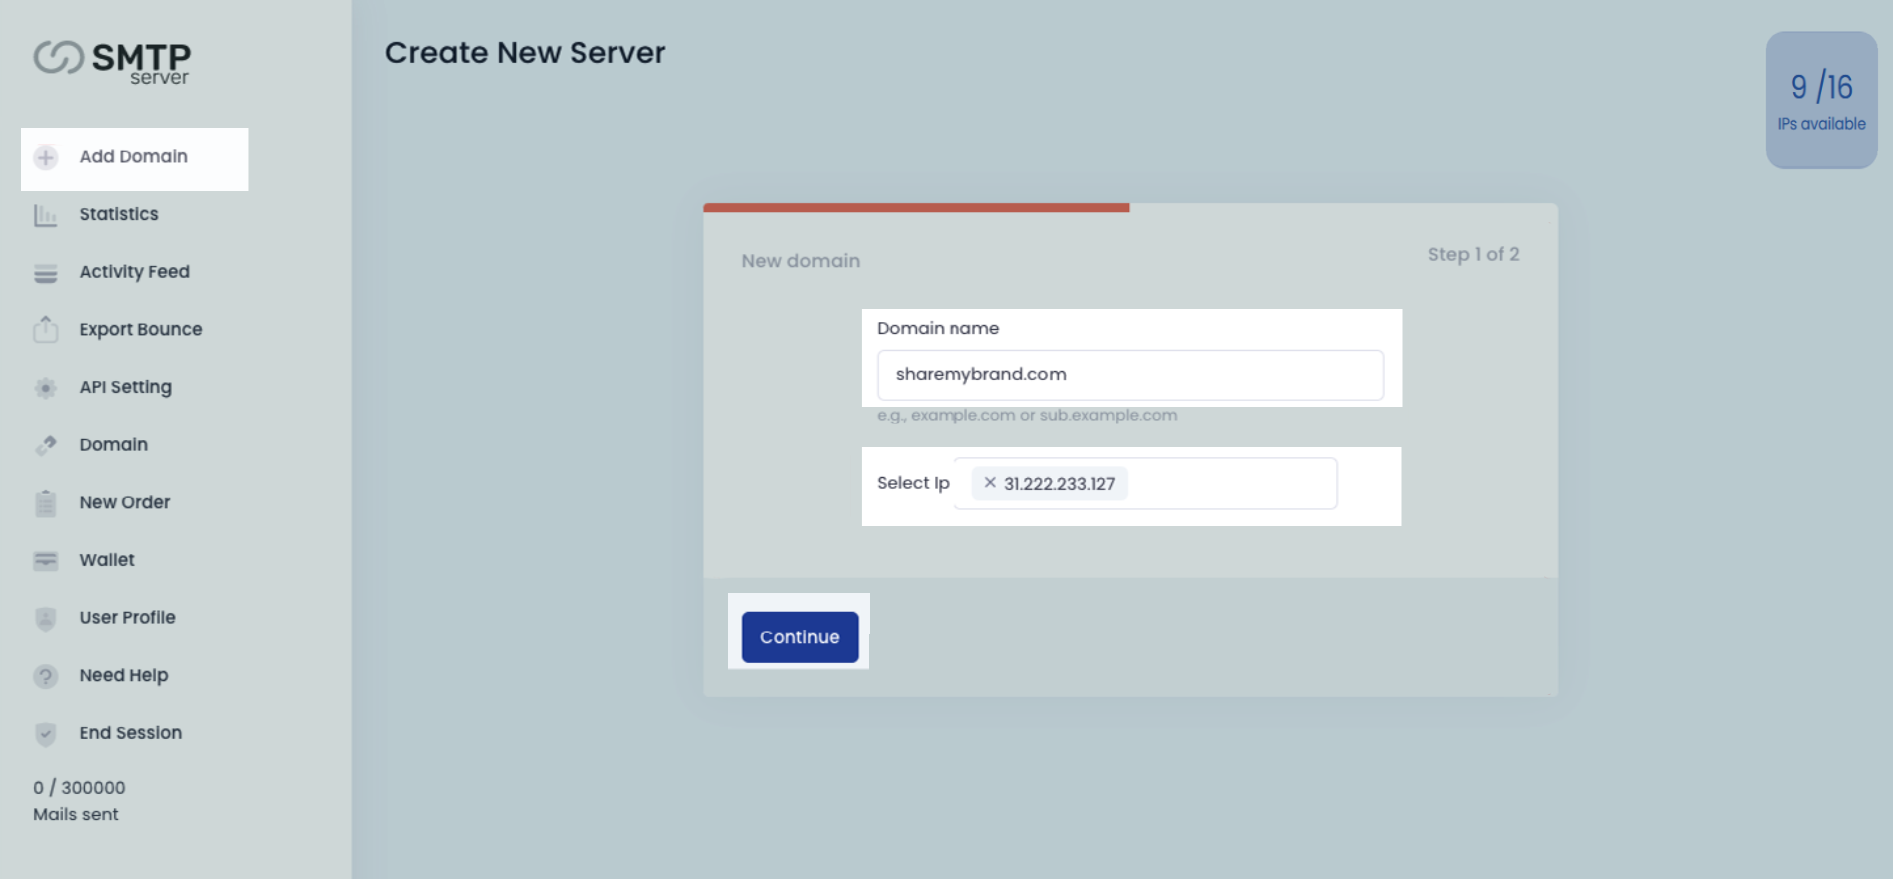
Para verificar um domínio, um registro CNAME deve ser adicionado ao host do domínio. O host do seu domínio normalmente é onde você comprou seu nome de domínio (como GoDaddy, ENãom ou Name.com). Para mapear seu site, você deve adicionar um registro CNAME ao host do seu domínio.
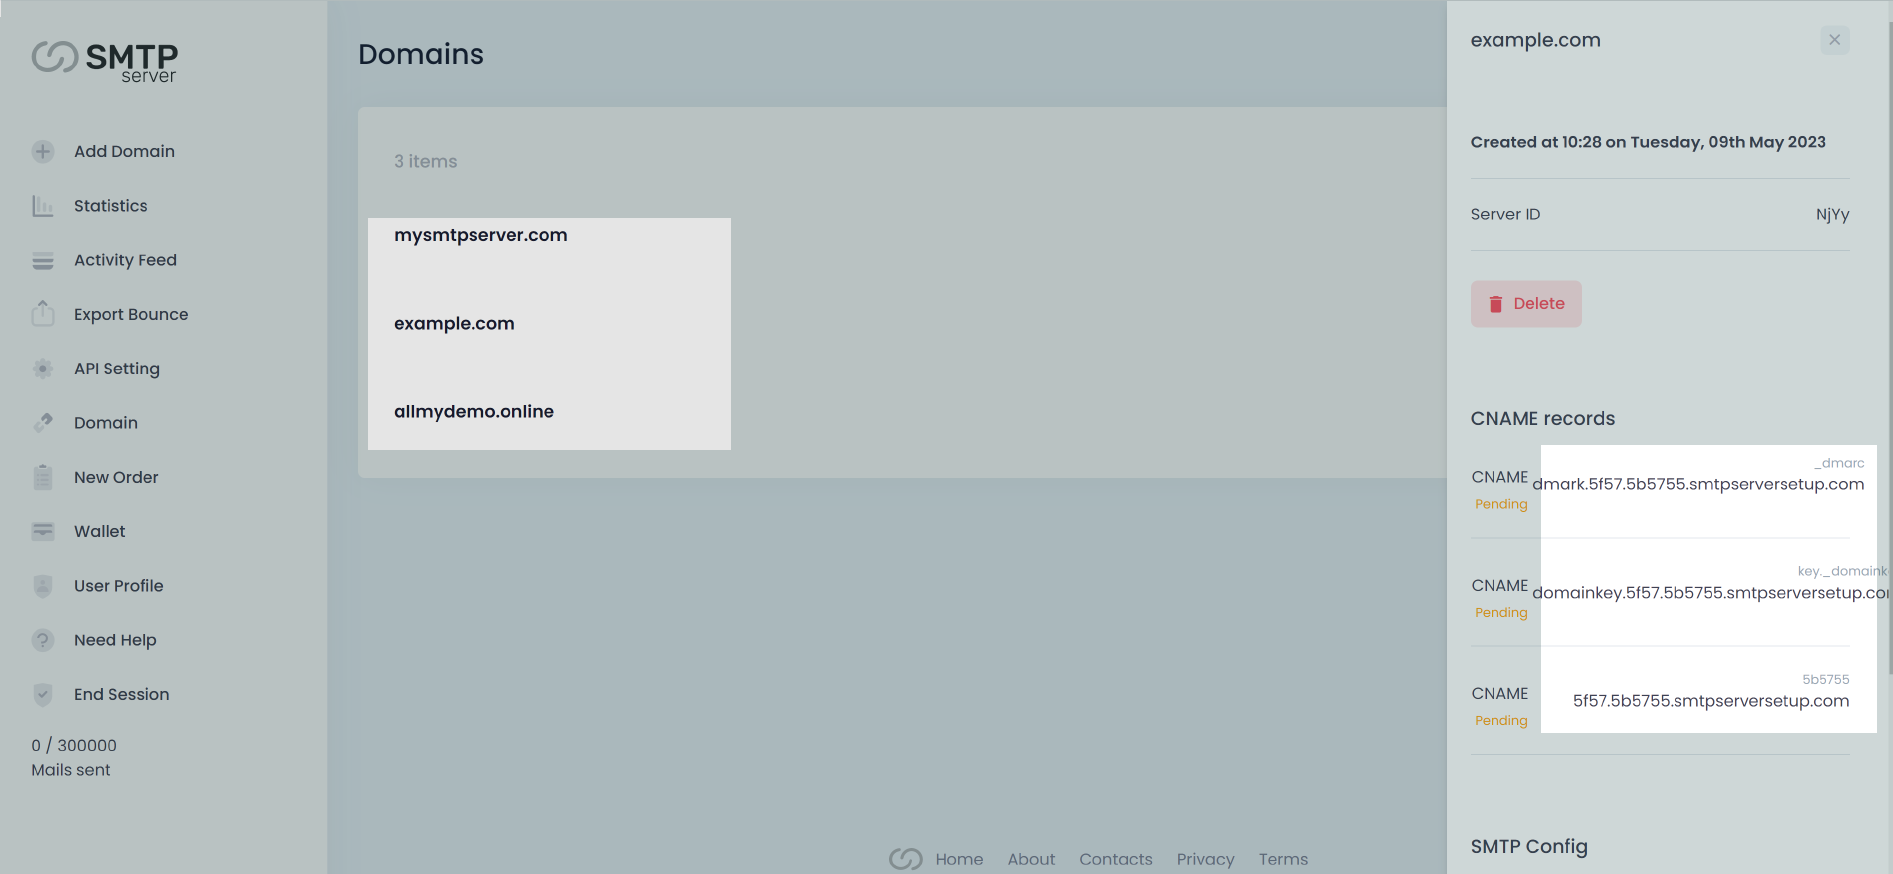
Após solicitar seu IP, você precisará adicionar seu domínio, que será usado para enviar e-mails. Você pode concluir essa etapa em três etapas fáceis. Ao final do processo, você terá três registros CNAME para adicionar ao registro DNS do seu domínio. A configuração parece ser a seguinte:

Nãow, Acesse sua conta de hospedagem de domínio e escolha seu domínio. Depois, acesse o menu DNS e adicione os registros.
Se não tiver certeza do que são registros CNAME, peça ajuda ao seu host de domínio. Ao ligar ou enviar um e-mail para a equipe de suporte, você pode usar o modelo de e-mail abaixo. Siga as etapas abaixo para adicionar o registro CNAME ao seu host de domínio. Informações mais detalhadas podem ser encontradas na documentação fornecida pelo seu host de domínio. As configurações de DNS no nosso exemplo são gerenciadas pela Cloudflare.
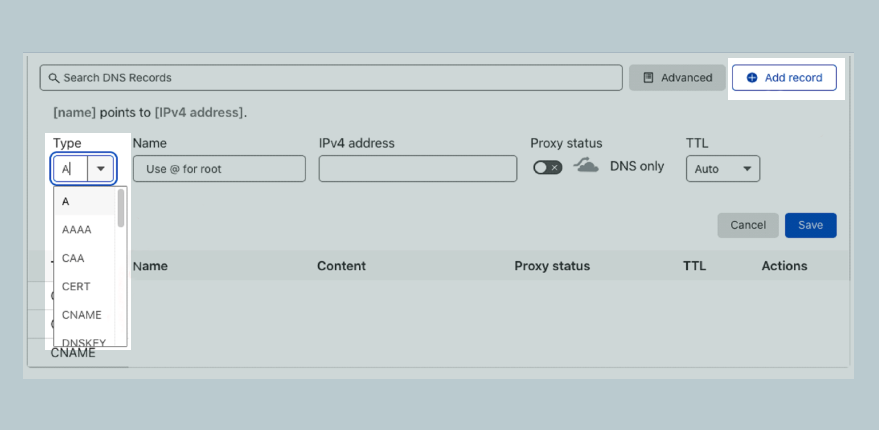
3. Volte para a primeira janela ou guia e copie o conteúdo do campo Rótulo/Host.
4. Com seus registros DNS, cole os dados copiados na caixa Rótulo ou Host.
5. Volte para a primeira janela ou guia e copie o conteúdo do campo Destino/Alvo.
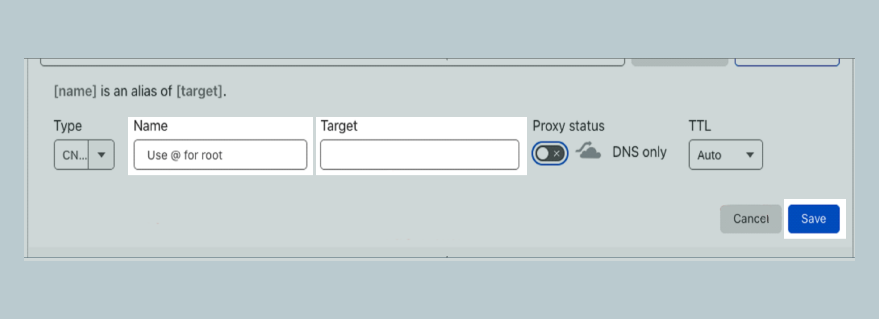
6. Com seus registros DNS, cole os dados copiados na caixa Destino.
Seu registro deve se parecer com uma das seguintes tabelas:
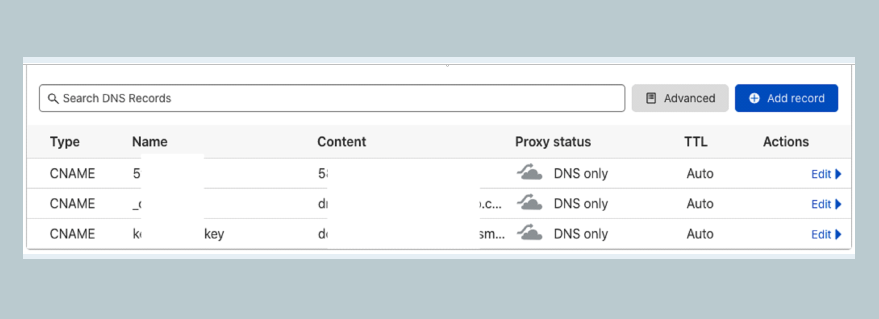
Após modificar o registro CNAME, acesse o menu de domínio no programa Servidor SMTP e verifique o status do seu domínio. Se todos os registros tiverem sido atualizados corretamente, o status "Ativo" será exibido; caso contrário, o status será "Pendente". Se o status permanecer "Pendente" após 5 minutos, verifique o registro CNAME ou entre em contato com nossa equipe de suporte.
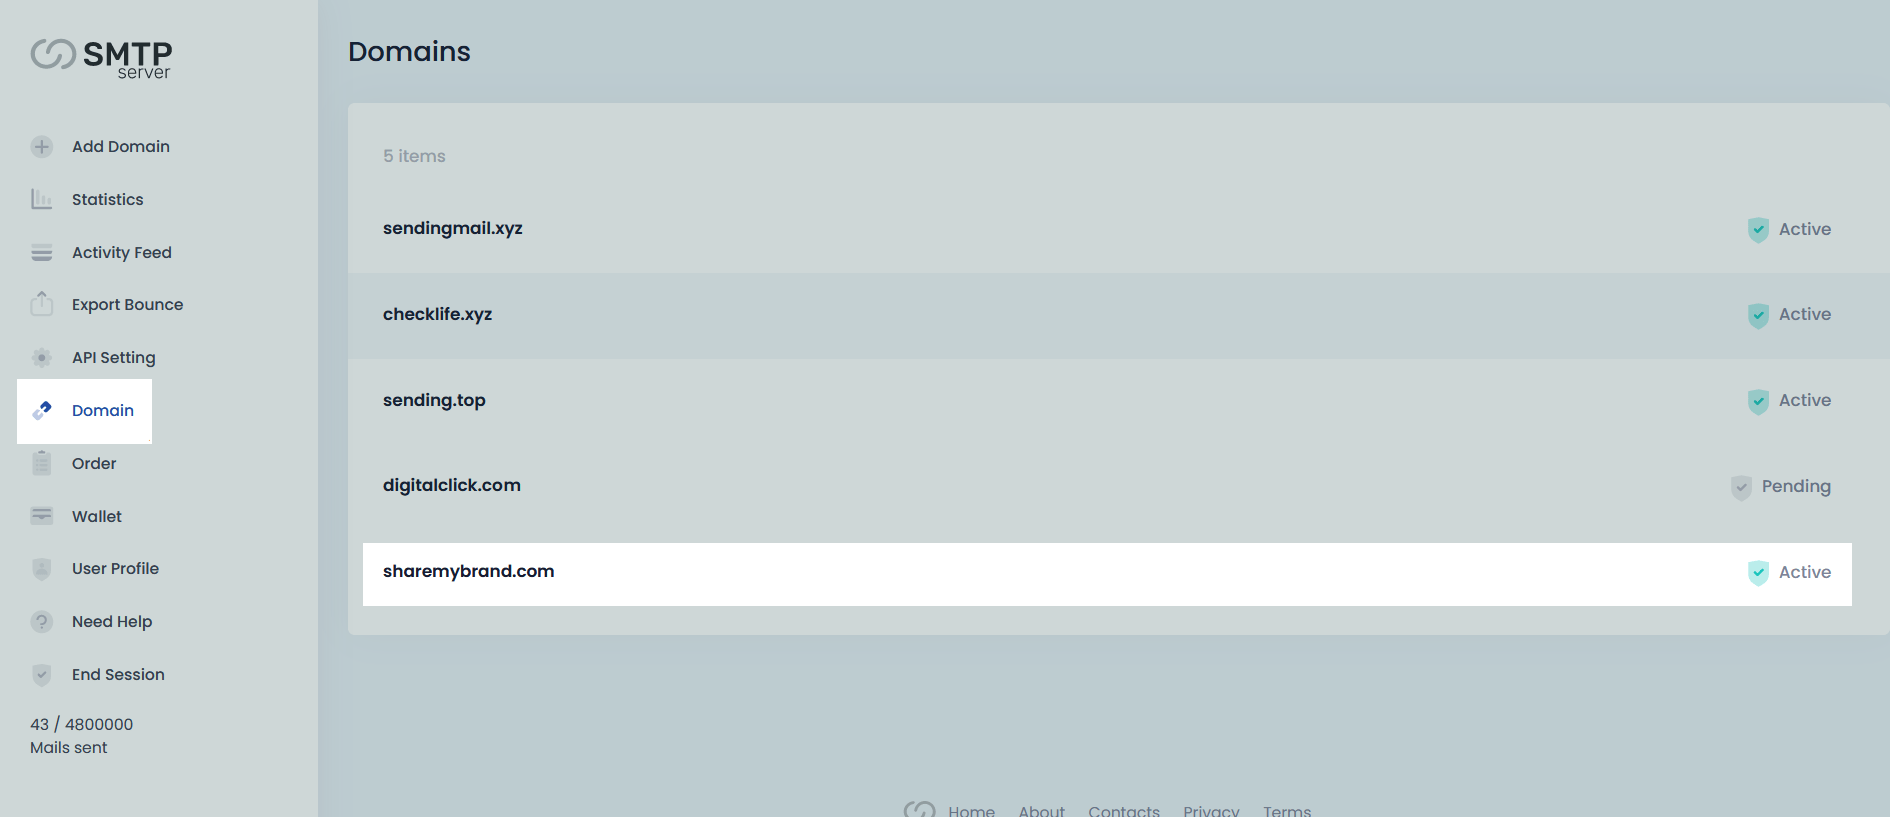
Ao clicar no nome de domínio, você verá as especificações do seu servidor SMTP, caso tudo seja atualizado com sucesso. Veja como ficará.
Agora você está preparado para integrar o SMTPServer ao seu aplicativo. Esta página demonstra a opção de Servidor SMTP para o aplicativo Mautic. Os aplicativos são essencialmente idênticos. Consulte a documentação oficial do aplicativo para obter mais informações.
Ao rolar para baixo neste painel direito depois de verificar seu domínio, você verá as configurações de "Configuração SMTP".
Configuração SMTP do Mautic
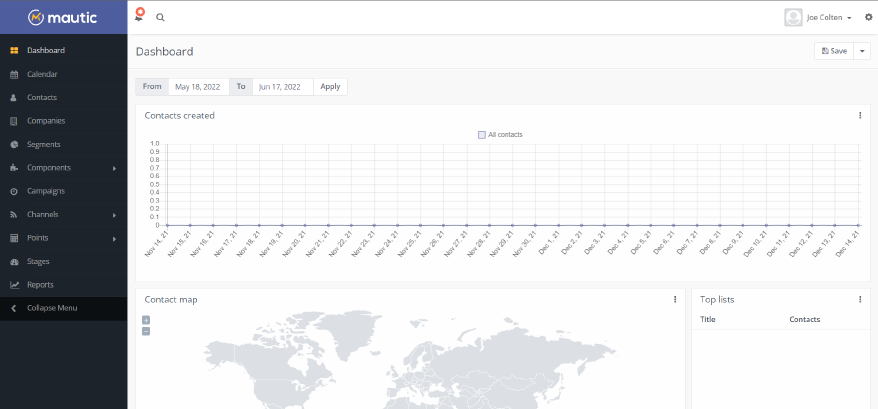
Após fazer login com suas credenciais Mautic, você estará no “Painel”
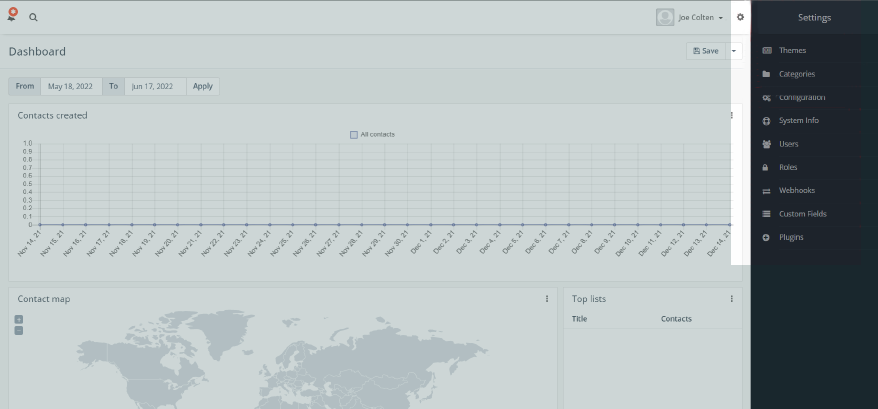
No Painel, clique no ícone Configurações (ícone de engrenagem) no canto superior direito da página → Um novo painel aparecerá no lado direito com alguns menus e o título Configurações → No menu Configurações, clique na opção “Configuração”
Uma nova página chamada “Configuração” será carregada com uma aba vertical de menus → No menu, clique em “Configurações de e-mail” → Uma seção será carregada com “Configurações de envio de e-mail”
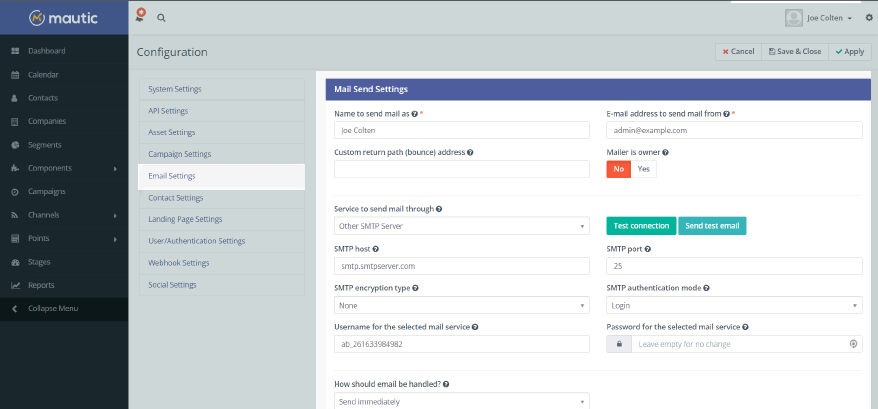
Nãow na seção “Configurações de Envio de E-mail”, selecione a opção “Outro Servidor SMTP” no menu suspenso de “Serviço para enviar e-mail” → Em seguida, selecione a opção “Login” no menu suspenso de “Modo de autenticação SMTP” → Em seguida, preencha todos os campos obrigatórios com os detalhes da Configuração SMTP encontrados no Ponto 1 (Onde obter os detalhes da configuração SMTP?) → Em seguida, clique em “Aplicar” e “Salvar e Fechar” para salvar a configuração (Você também pode testar as configurações SMTP clicando no botão Testar conexão)

Nãow depois de ter um domínio validado, você pode enviar seu primeiro e-mail! Existem vários métodos de envio disponíveis. Vamos examinar algumas opções para enviar um e-mail de teste. No seu aplicativo integrado, há uma opção de e-mail de teste. Tente enviar o e-mail. Se todos os procedimentos anteriores forem executados corretamente, o aplicativo enviará um e-mail de teste.
Depois que seu aplicativo estiver configurado, a etapa mais crucial foi concluída: você agora poderá enviar e-mails para seus clientes a partir do seu aplicativo de forma confiável.
Mesmo assim, reconhecemos que há ocasiões em que você simplesmente quer fazer uma pergunta a alguém. Além disso, podemos ajudar você nesse sentido. Temos uma equipe de suporte excepcional disponível para resolver qualquer problema que você possa ter. Basta enviar um e-mail para [email protected] e responderemos em até um dia. Além disso, oferecemos suporte por chat.