32,575 total views, 10 views today
If you bought your domain name through Dynadot, you need to point your domain name to SMTPServer in a different way before you can send an email. This article is about how to add three new CNAME records, which is what you need to do.
Step 1: Add your Domain to SMTPServer
You need to first add your domain to the SMTPServer portal. Choose the top left option ‘Add Domain’ for this.
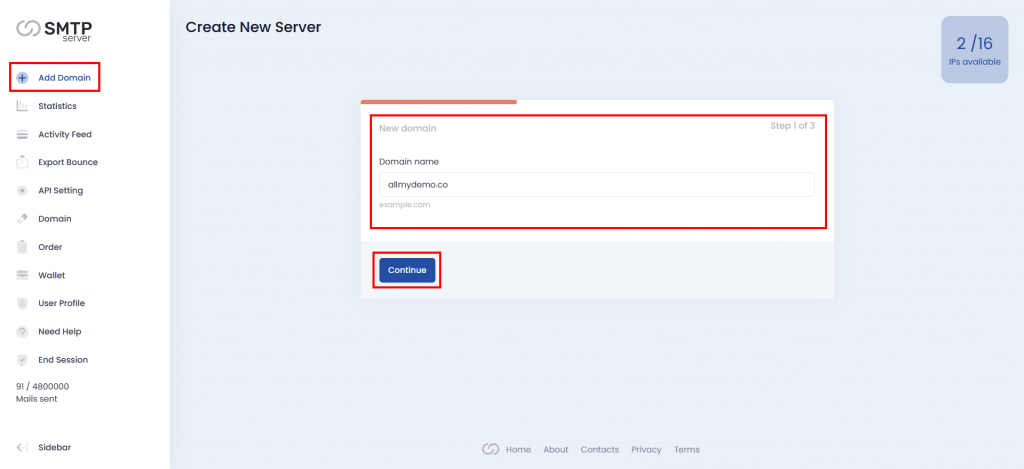
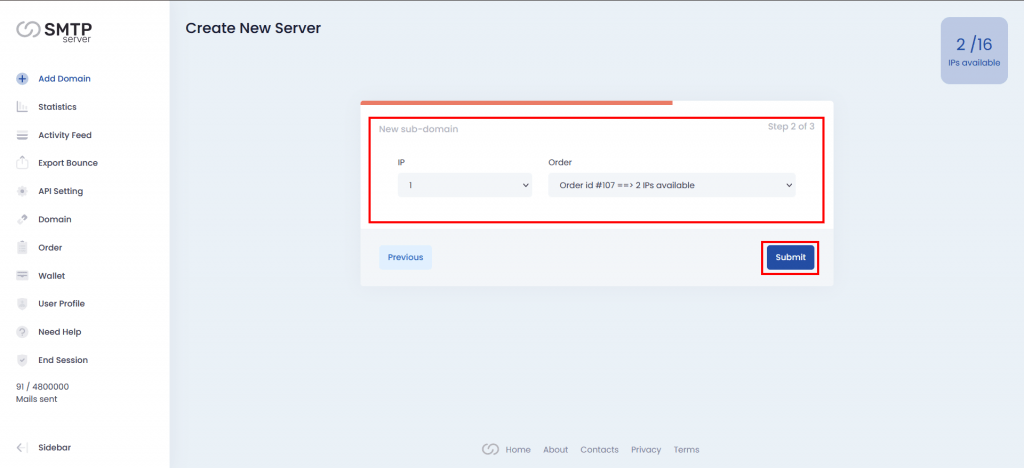
Step 2: Choose the Number of IP
Choose the number of IPs you want to configure with this domain and choose the Order number (only if you have multiple orders) to continue.
Step 3: Copy DNS Records
Now you have three CNAME records that you need to add to your Dynadot. Copy these records.

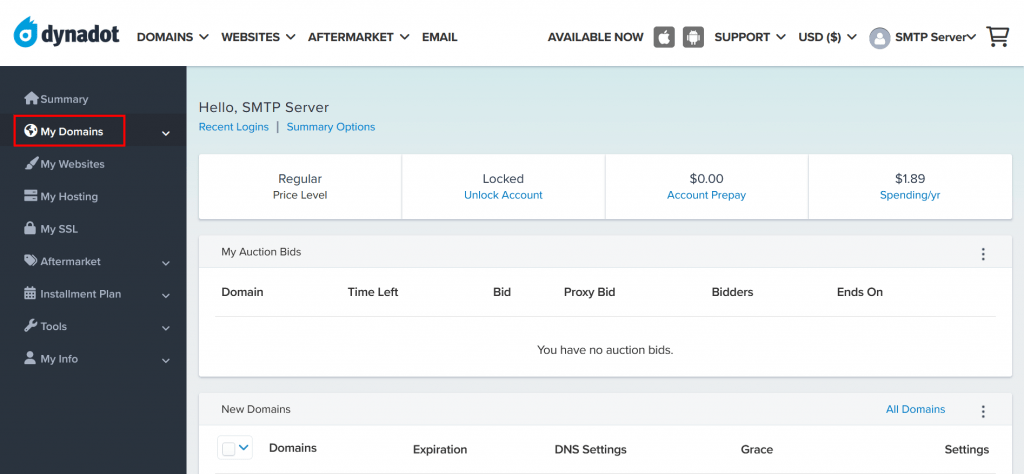
Step 4: Go to DNS Management in Dynadot
First, you have to log in to your Dynadot account. Then you will have the dashboard of Dynadot. Click on ‘My Domains’ from the left side menu.
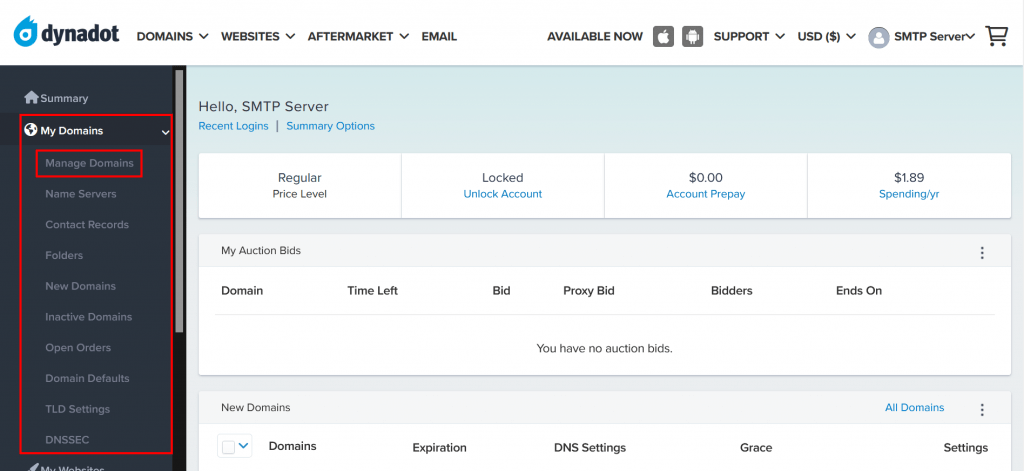
Click the ‘Manage Domains’ from the menu.
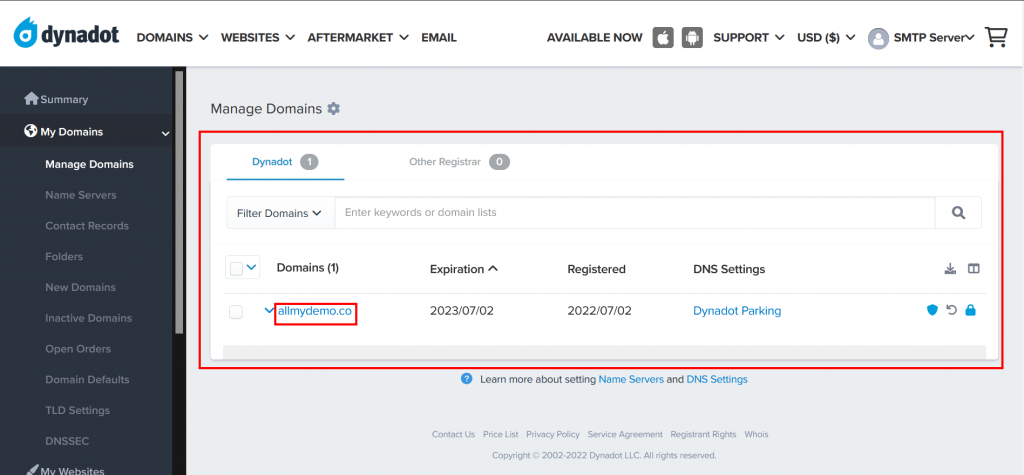
Step 5: Add Your CNAME Records
You will find there are some already existing records there. If you find those are not important then you can delete them, otherwise, just skip them.
Click on the domain name for more setting options.
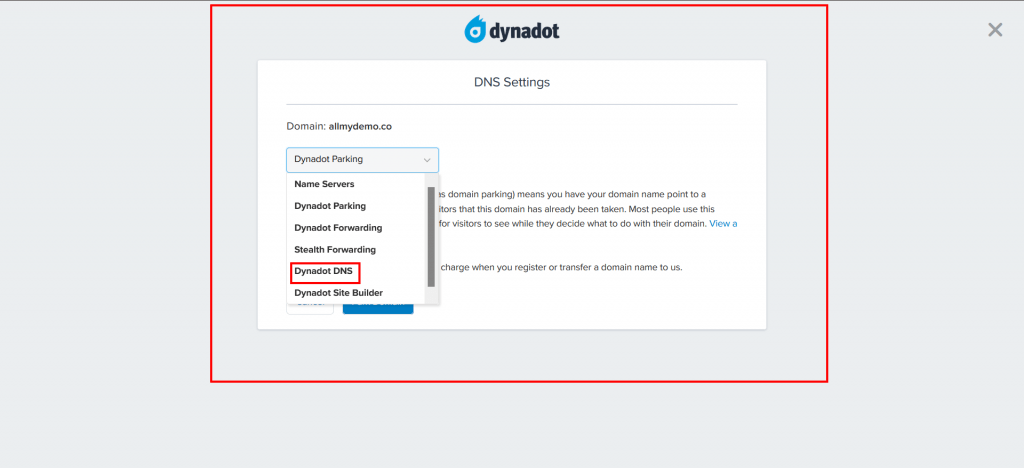
Choose ‘DNS Settings’ and then click ‘>’ icon.
![]()
After that choose ‘Dynadot DNS’ for adding custom DNS settings.
Under ‘Subdomain Records’ click on ‘Add Record’.
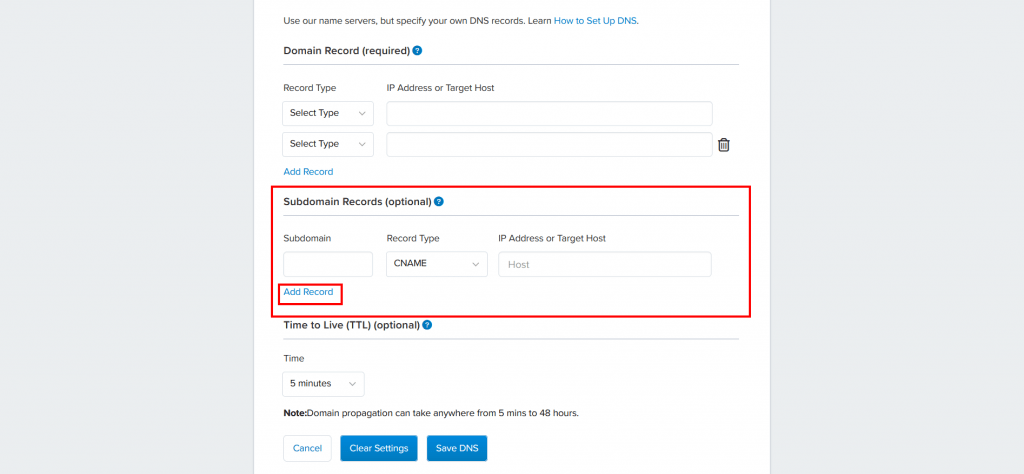
Now Add those records which you copied from SMTPServer.
Subdomain: From SMTPServer the Host data will be put here.
Record Type: Choose CNAME Record from the dropdown list.
IP Address or Target Host: From SMTPServer the Value data will be put here.

Step 6: Verified by SMTPServer
Once you add all CNAME records in Dynadot successfully then come back to SMTPServer and choose the Domain option. Previously it was ‘Pending’ status. But once you add the DNS records now it will become Active (if not then please wait for 5 min to verify DNS records). Now you are ready to send mail.

Hope this article will be helpful for you. Or you can contact our support team.